The screen printing process is behind almost every bold graphic tee and hoodie you have ever loved. It is one of the oldest printing methods in the world, yet it is still the first choice for streetwear brands because nothing else gives such thick, vibrant and long-lasting prints on fabric. But how does a design on a computer end up as a crisp print on a hoodie?
In this guide, we walk through the complete screen printing process step by step: how screen printing works, how screens are made, how a design is “burned” onto the screen, and every tool and material used from the blank mesh to the final cured print.
What Is Screen Printing?
Screen printing is a stencil printing method. Ink is pushed through a fine mesh stretched on a frame, and a stencil on that mesh blocks the ink everywhere except in the shape of your design. Each colour in a design needs its own screen, and the colours are printed one after another, perfectly lined up. You can read more about its long history on Wikipedia’s screen printing page.
The basic idea is simple:
- The open areas of the mesh let ink pass through onto the fabric.
- The blocked areas, covered by hardened emulsion, stop the ink.
- A squeegee pushes the ink through the open areas in one smooth stroke.
Everything Used in the Screen Printing Process
Before we go step by step, here is the full list of equipment and materials, from making the screen to printing the garment.
For Making the Screen
- Frame: Aluminium frames are the professional choice because they stay straight; wooden frames are cheaper and fine for beginners.
- Mesh: Polyester mesh stretched tightly on the frame. It is sold by mesh count (threads per inch).
- Degreaser: A cleaning solution that removes dust and oil so the emulsion sticks properly.
- Photo emulsion: A light-sensitive liquid coating that hardens when exposed to UV light.
- Scoop coater: A metal trough used to spread an even layer of emulsion on the mesh.
- Film positive: The design printed in solid, opaque black on a transparent film.
- Exposure unit: A UV light source that “burns” the design onto the screen.
- Washout booth or sink with a pressure hose: To rinse away the unhardened emulsion.
- Screen tape and blockout liquid: To seal the edges and fill any pinholes.
For Printing
- Printing press: A manual or automatic carousel press that holds the screens and garments in exact registration.
- Platen: The flat board the garment is loaded on, usually with a light spray or glue adhesive to stop it moving.
- Squeegee: A rubber blade on a handle, chosen by hardness (durometer).
- Ink: Plastisol, water-based or discharge ink, plus speciality inks such as puff or metallic.
- Flash dryer: A heater that quickly semi-dries a layer of ink between colours.
- Conveyor dryer or heat press: To fully cure the ink so it survives washing.
- Heat gun and temperature strips or an infrared thermometer: To check curing temperature.
For Cleaning and Reusing Screens
- Ink cleaner or press wash
- Emulsion remover to strip the stencil
- Haze or ghost remover for stubborn stains
Step 1: Preparing the Artwork
Every screen printing job starts with artwork. The design is separated into individual colours, and each colour becomes its own black-and-white layer. A three-colour design means three separate films and three separate screens.
Some important points at this stage:
- Artwork should be in high resolution or vector format for sharp edges.
- Shading and gradients are converted into halftones, small dots that trick the eye into seeing tones.
- For dark garments, an extra white underbase layer is usually added so colours on top stay bright.
- Registration marks are added to every layer so all colours line up perfectly.
Step 2: Printing the Film Positive
Each colour layer is printed on a transparent film using solid, dense black ink. This film acts like a photographic negative. Wherever the film is black, UV light will be blocked and the mesh will stay open for ink. The darker and more opaque the black, the sharper the final stencil will be.
Step 3: Choosing the Right Mesh Count
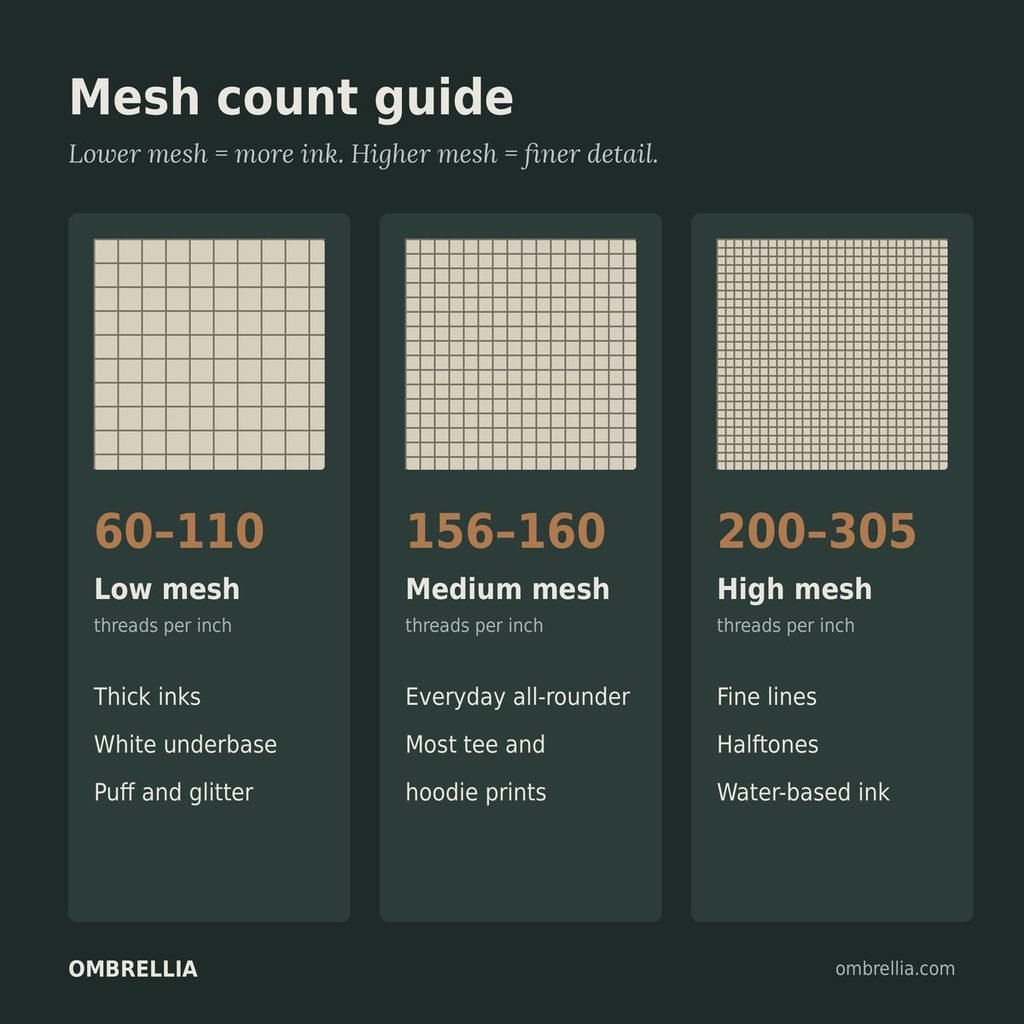
Mesh count controls how much ink passes through and how much detail the screen can hold. Lower counts have bigger openings and lay down more ink; higher counts hold finer detail with a thinner ink layer. As a general guide:
- Low mesh (around 60–110): Thick inks, white underbases, puff and glitter inks, bold designs.
- Medium mesh (around 156–160): The everyday all-rounder for most t-shirt and hoodie prints.
- High mesh (around 200–305): Fine lines, detailed artwork, halftones and water-based inks.
The mesh must also be tightly and evenly stretched. A loose screen causes blurry edges and poor registration.
Step 4: How Screens Are Made
Making the screen means turning plain mesh into a stencil. This is where most of the craft of the screen printing process lies.
Degreasing
The mesh is scrubbed with a degreaser on both sides, rinsed well and left to dry completely in a dust-free area. Any oil, even from fingerprints, can cause the emulsion to fail later.
Coating the Screen with Emulsion
In a room with safe yellow or red light, photo emulsion is poured into a scoop coater. The coater is held against the tilted screen and pulled up in one smooth stroke, first on the print side and then on the squeegee side. The goal is a thin, even and bubble-free coat.
There are three common types of emulsion:
- Diazo: Affordable and forgiving, but needs longer exposure. Must be mixed with a sensitiser before use.
- Photopolymer: Ready to use and very fast to expose. Great for high-volume work.
- Dual-cure: A mix of both; strong, detailed and durable. Popular for professional garment printing.
Drying in the Dark
Coated screens are dried horizontally, print side down, in a completely dark, dust-free cabinet. A small fan and low heat help. Any light exposure at this stage will spoil the emulsion.
Step 5: Burning the Design onto the Screen (Exposure)
This is the step people often call “embossing” or “burning” the design onto the screen, and it is the heart of how screen printing works.
- The film positive is placed on the glass of the exposure unit, reading correctly from the print side.
- The dry, coated screen is laid on top of the film with the print side touching it.
- A vacuum blanket or a heavy weight presses the film and mesh tightly together so light cannot sneak under the design.
- The UV light is switched on for a set time.
Wherever UV light hits the emulsion, it hardens and becomes waterproof. Wherever the black design on the film blocks the light, the emulsion stays soft and water-soluble.
Exposure time depends on the light source, the emulsion, the mesh and the thickness of the coat. Instead of guessing, printers run an exposure calculator or step test: they expose one screen in sections for different times and check which section washes out cleanly with the sharpest detail.
Step 6: Washing Out the Stencil
Right after exposure, the screen is sprayed with water on both sides. The soft, unexposed emulsion washes away, revealing the open design in the mesh. The hardened emulsion stays in place and forms the stencil.
- Underexposed screens feel slimy, lose fine detail and can break down during printing.
- Overexposed screens do not wash out properly and fine lines stay blocked.
After washout, the screen is dried again and checked against light for pinholes.
Step 7: Finishing the Screen
- Blockout: Tiny pinholes are filled with blockout liquid or emulsion.
- Taping: The inner edges where the mesh meets the frame are taped so ink cannot leak.
- Post-exposure (optional): Some printers expose the finished screen again or leave it in sunlight to make the stencil even stronger for long runs.
Step 8: Setting Up the Press
The screens are clamped onto the press, one screen per colour. Using the registration marks, each screen is carefully adjusted so all colours align. A few more things are set at this stage:
- Off-contact: A small gap, usually a few millimetres, between the screen and the garment. It lets the mesh snap back after each stroke for a crisp print.
- Platen adhesive: A light layer of adhesive keeps the garment from shifting.
- Test prints: Test prints on scrap fabric or a test shirt confirm alignment before the real run begins.
Step 9: Choosing the Ink
- Plastisol ink: The most common ink in garment printing. It is opaque, vibrant and very beginner-friendly because it does not dry in the screen. It must be heat-cured.
- Water-based ink: Soaks into the fabric for a soft, breathable feel. Popular for premium and vintage-style prints, but it can dry in the screen if you work slowly.
- Discharge ink: Removes the dye from dark cotton garments and replaces it with colour, giving an extremely soft print. Works only on suitable dyed cotton.
- Speciality inks: Puff ink rises when heated to create a raised, 3D embossed effect. Metallic, glitter, glow-in-the-dark and high-density inks add texture and shine.
If you want a truly embossed feel on the fabric itself, puff ink or high-density ink printed through a low-mesh, thick-stencil screen is the way to get it.
Step 10: Printing the Garment
- Load the garment smoothly onto the platen, centred and wrinkle-free.
- Pour a line of ink across the top of the screen.
- Flood stroke: With the screen lifted slightly, gently drag ink across the design to fill the open mesh.
- Print stroke: Lower the screen and pull the squeegee firmly at around a 60–75 degree angle with even pressure. The ink is pushed through the stencil onto the fabric.
- Lift the screen and check the print.
Squeegee hardness matters. A medium blade of around 70 durometer is the standard choice for most prints. Softer blades lay down more ink; harder blades give sharper detail.
Step 11: Flash Curing Between Colours
When printing a multi-colour design, especially on dark garments, each layer is quickly “flashed” under a flash dryer until the surface is dry to the touch. This stops the next colour from mixing into the wet layer below. The white underbase is almost always flashed before the colours go on top.
Step 12: Final Curing
Curing is what makes a screen print last through dozens of washes. The printed garment passes through a conveyor dryer, or is pressed with a heat press, until the whole ink layer reaches the curing temperature recommended by the ink manufacturer. For most plastisol inks, this is around 160°C across the full thickness of the ink.
Under-cured prints may look fine at first but crack and peel after washing. A simple stretch test on a cooled print, plus a temperature strip or infrared thermometer, helps confirm a proper cure.
Step 13: Cleaning and Reclaiming Screens
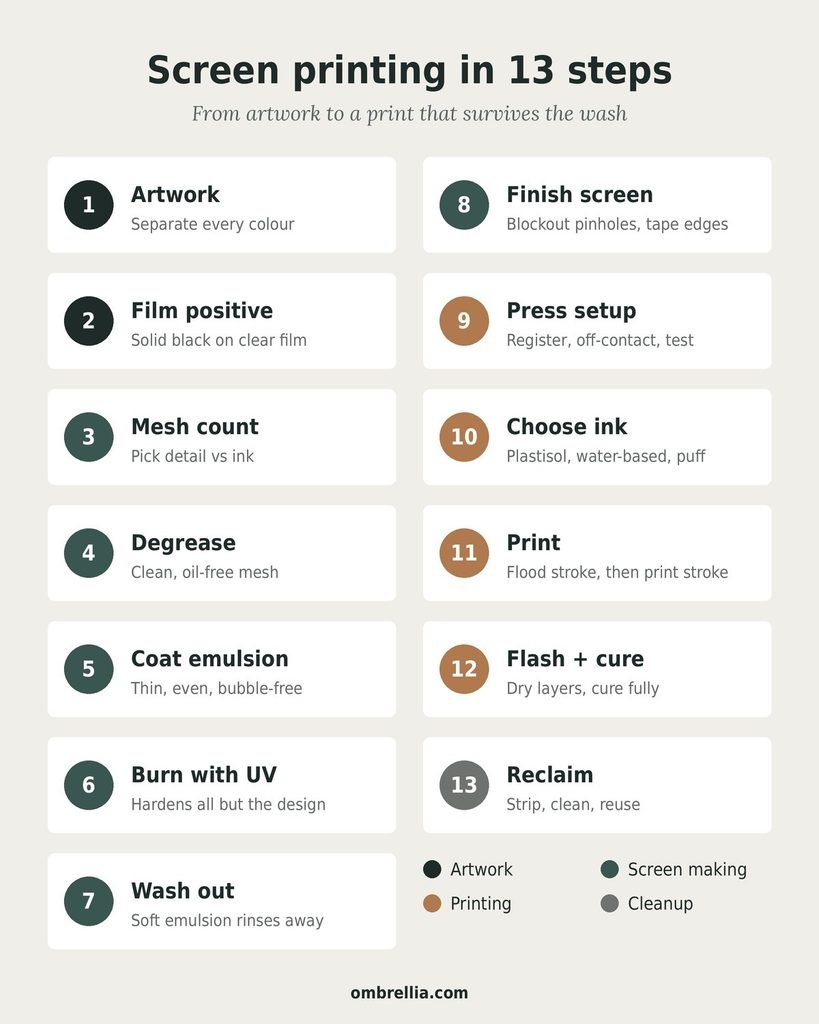
After the run, leftover ink is scraped back into its container and the screen is cleaned with ink cleaner. If the design will not be used again, emulsion remover is applied to dissolve the stencil, and a pressure washer clears the mesh. A haze remover can lift any stubborn ink stains. The frame and mesh can then be degreased and coated again for a new design.
Common Screen Printing Problems and Fixes
- Blurry edges: Too much off-contact, too much pressure or a loose mesh.
- Pinholes in the print: Dust during coating or drying; fix with blockout.
- Stencil breaking down: Underexposed screen; run a new exposure test.
- Fine details missing: Overexposure, low mesh count or a weak film positive.
- Print cracking after washing: Ink not fully cured.
- Colours not lining up: Poor registration or garments shifting on the platen.
Screen Printing vs Other Printing Methods
- Vs DTG (direct-to-garment): DTG is better for small quantities and photo-like designs, while screen printing is more durable, more vibrant and cheaper for larger runs.
- Vs DTF (direct-to-film): DTF is flexible for many colours and small batches, but a good screen print usually feels softer and lasts longer.
- Vs heat transfer vinyl: Vinyl suits names and numbers; screen printing is better for detailed graphics and bulk production.
For streetwear drops with bold graphics printed in batches, screen printing remains the gold standard. It is why well-made printed hoodies, like those in the Ombrellia hoodie collection, are valued for prints that stay sharp wash after wash.
Frequently Asked Questions
How does screen printing work in simple words?
A stencil is made on a fine mesh screen using light-sensitive emulsion. Ink is then pushed through the open parts of the stencil onto the fabric with a squeegee, one colour at a time, and finally heat-cured.
How is the design put on the screen?
The screen is coated with photo emulsion, dried in the dark and exposed to UV light with the printed film on top. The light hardens the emulsion everywhere except the design, which is then washed out with water.
What mesh count is best for t-shirt printing?
A mesh of around 156–160 works for most t-shirt and hoodie designs. Use lower mesh for thick inks and underbases, and higher mesh for fine detail and halftones.
How do you get a raised or embossed print?
Use puff ink or high-density ink with a low-mesh screen and a thicker stencil. Puff ink expands with heat during curing to create a raised, 3D texture.
How long does a screen print last?
A properly cured screen print can last as long as the garment itself when washed inside out in cold water and not ironed directly.
Final Thoughts
The screen printing process combines chemistry, precision and craft. From degreasing the mesh and burning the design with UV light to flashing, curing and reclaiming the screen, every step affects how the final print looks and lasts. Once you understand how screen printing works, you will never look at a graphic hoodie the same way again.